
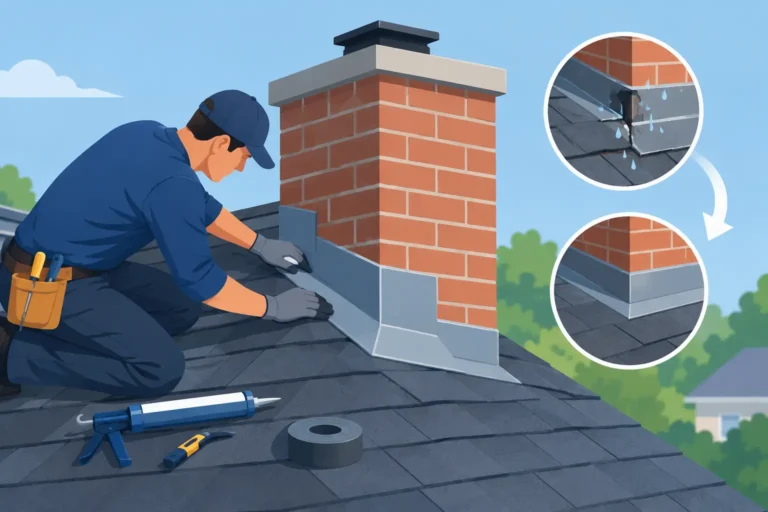
A ceiling stain near a chimney or a damp spot in the attic does not always mean the entire roof has failed. Very often, the problem is at the metal details that protect roof transitions. To repair flashing leaks correctly, the source has to be identified before water reaches the underlayment, decking, insulation, or interior finishes.
Flashing is one of the most important parts of a roofing system, but it is easy to overlook because it is installed around the roof’s most complicated areas. It directs water away from chimneys, walls, valleys, skylights, vent pipes, and other penetrations. When flashing loosens, rusts, cracks, or separates from the roofing material, water can find its way inside even if the shingles or metal panels still look sound.
Why Flashing Leaks Need Prompt Attention
A small flashing leak can cause more damage than most property owners expect. Water may travel along framing or under roofing materials before it becomes visible indoors. By the time a stain appears on drywall, there may already be wet roof decking, damaged insulation, mold growth, or deteriorating wood around the affected area.
In Tuscaloosa, Birmingham, and surrounding Alabama communities, wind-driven rain and severe storms can expose weak flashing quickly. High winds can lift a flashing edge, break a seal at a pipe boot, or dislodge shingles that overlap the metal. Hail can also dent soft metal and damage the sealant or fasteners around roof penetrations.
The right repair depends on what failed. A loose piece of flashing may be repairable. Flashing with widespread corrosion, storm damage, improper installation, or deteriorated roofing materials around it may require a larger repair or replacement of that roof section.
Where Flashing Leaks Usually Start
Roof flashing is not one single component. Different flashing details are used in different locations, and each has its own common failure points.
Chimneys and Sidewalls
Chimney flashing typically includes base flashing, step flashing, and counterflashing. Step flashing is woven into the shingles along the side of the chimney, while counterflashing covers the top edge to keep water out. Mortar joints can crack, old sealant can fail, and improperly lapped metal can allow water behind the system.
Sidewall flashing has similar concerns. If siding, brick, or trim is not properly integrated with the flashing, rain can enter behind the wall covering and reach the roof deck.
Pipe Boots and Roof Vents
Plumbing vent pipes are among the most common locations for roof leaks. The rubber or neoprene collar around a pipe boot can crack from sun exposure and age. On a shingle roof, the metal base may be installed incorrectly or the surrounding shingles may have been damaged by wind.
Static vents, powered vents, and turbine vents can also leak when fasteners back out, seals dry out, or the flashing flange is not correctly tied into the roofing material.
Skylights, Valleys, and Roof-to-Wall Transitions
Skylights need carefully installed flashing kits and correct shingle overlap. A leak around a skylight is not always a failed skylight, but it should not be assumed to be a simple caulking issue either.
Valleys and roof-to-wall transitions handle concentrated water flow. Debris buildup, missing shingles, open seams, and bent metal can all force water beneath the roof covering. These areas deserve close inspection after a major storm.
Warning Signs You May Have a Flashing Problem
Some flashing failures are visible from the ground, such as lifted metal, missing shingles near a chimney, or a cracked pipe boot. Others require an attic or roof-level inspection. Watch for water stains near exterior walls, chimneys, skylights, or bathroom vents. Dripping after wind-driven rain, peeling paint, damp attic insulation, and a musty odor can also point to an active leak.
The timing of the leak matters. If water appears only during hard rain blowing from a certain direction, the issue may be at sidewall flashing, a chimney, or another transition rather than a broad failure across the roof. If a leak appears after every rain, the opening may be more exposed or the roof system may have more extensive damage.
Do not rely on the visible stain to locate the leak. Water can enter several feet uphill from where it finally drips into the attic or ceiling.
How Professionals Repair Flashing Leaks
A dependable flashing repair starts with inspection, not a tube of sealant. Sealant has a role in certain roofing details, but it should reinforce a properly installed system, not replace missing metal, damaged shingles, or correct layering.
A roofing professional first checks the roof surface, flashing condition, fasteners, shingles or panels, and the attic when accessible. The goal is to identify the entry point and determine whether storm damage, wear, poor installation, or movement around the structure caused the failure.
For a localized repair, the contractor may remove shingles or roofing panels around the problem area, replace damaged flashing, install new underlayment where needed, and reinstall compatible roofing materials with the correct overlap. On a chimney, that can mean replacing step flashing and counterflashing rather than coating the edges with caulk. Around a vent pipe, it may mean replacing the boot and properly integrating its flange beneath the shingles above it.
Metal roofs require their own approach. Flashing seams, closures, fasteners, and pipe penetration boots must work with the panel profile and expansion of the metal. A repair that works on an asphalt shingle roof may not be appropriate for standing seam or exposed-fastener metal systems.
For commercial roofs, flashing repairs may involve TPO, PVC, EPDM, modified bitumen, metal, or coating systems. The material must be compatible with the existing roof. Applying an incompatible product can create a temporary-looking fix while allowing moisture to remain trapped below the membrane.
When a Small Repair Is Enough and When It Is Not
A straightforward repair may be enough when the flashing damage is isolated, the surrounding roofing materials are in good condition, and there is no meaningful decking or interior damage. Replacing a cracked pipe boot or resetting a small section of displaced flashing can stop a leak and extend the roof’s service life.
A larger repair may be the better choice when the flashing has failed because shingles are brittle, the roof deck is soft, multiple penetrations are leaking, or storm damage affects a wider area. Repeated patching can become more expensive than addressing the underlying problem correctly.
Age matters, but it is not the only factor. A newer roof with wind damage may warrant a targeted repair or an insurance claim review. An older roof with multiple worn components may be approaching replacement. An honest inspection should explain both paths clearly, without pressure.
What Property Owners Should Do Before Help Arrives
If water is actively entering the building, protect the interior first. Move furniture and electronics away from the affected area, place a container under drips, and document visible damage with photos. If water is causing a ceiling to bulge, avoid standing beneath it and contact a qualified professional promptly.
Avoid climbing onto a wet or storm-damaged roof. It is unsafe, and walking in the wrong area can break shingles, dent metal panels, or worsen the leak. Temporary tarp protection may be appropriate after major storm damage, but it should be installed securely and followed by a full inspection.
Keep records of the date of the storm, interior damage, and any visible roof damage. When a covered storm event caused the flashing failure, photos and a professional inspection can help support an insurance claim. Bluefin Exteriors can inspect the roof, explain the damage in plain terms, and help property owners understand the documentation needed for the claim process.
Preventing Future Flashing Failures
Flashing lasts longer when the entire roof system is maintained. Keep gutters and valleys clear so water does not back up at transitions. Trim limbs that scrape the roof during high winds. After a severe storm, look for missing shingles, displaced metal, exposed fasteners, or debris around vents and chimneys from the ground.
Regular inspections are especially worthwhile for older roofs, roofs with multiple penetrations, and commercial buildings where a small leak can interrupt operations. Catching a loose flashing edge early is usually simpler than repairing wet decking and interior finishes later.
If you suspect a flashing leak, act before the next heavy rain turns a manageable repair into a larger restoration project. A no-pressure roof inspection can give you a clear answer, protect your property, and help you make the right next decision with confidence.
